Crafting Comfort: DIY Projects & Inspired Living Spaces

Uncover the secrets of creating your own luxurious bath bombs at home. From the science behind the fizz to customizing your creations, dive into a world of relaxation.

Dive into DIY: Crafting Luxurious Handmade Bath Bombs

Uncover the secrets of creating your own luxurious bath bombs at home. From the science behind the fizz to customizing your creations, dive into a world of relaxation.

Image by Freepik

Bathing is not just about cleanliness; it’s an experience, a moment of relaxation, and for many, a brief escape from the rigors of daily life. Enter the world of handmade bath bombs – a fusion of science, art, and luxury. For those eco-conscious, DIY enthusiasts, wellness lovers, or anyone looking for a unique gift idea, creating your own bath bombs can be both fun and rewarding. Let’s dive into the effervescent world of bath bombs!

2. Safety First!

While making bath bombs is generally safe, it’s essential to take some precautions:

  • Always wear gloves, especially if you have sensitive skin.
  • Work in a well-ventilated area to avoid inhaling any fine particles.
  • Ensure your essential oils are skin-safe.
  • Always do a patch test with any new ingredient to avoid allergic reactions.

1. The Art and Science of Making Bath Bombs at Home

Crafting your own bath bombs is a delightful blend of chemistry and creativity. The basic ingredients include baking soda, citric acid, Epsom salts, essential oils, and water. When combined, a fizzy reaction occurs, leading to that signature effervescence when the bomb hits the water.


DIY Luxurious Bath Bomb Recipe:

Dry Ingredients:

  • 1 cup baking soda
  • 1/2 cup citric acid
  • 1/2 cup Epsom salts

Wet Ingredients:

  • 2 tsp water
  • 2 tsp essential oil (e.g., lavender or eucalyptus)
  • 1 tsp coconut oil (or any carrier oil)
  • A few drops of natural colorant (optional, e.g., beetroot powder for pink)

Steps to Create Your Bath Bomb:

  • Preparation: Lay out all your ingredients, a bowl for dry ingredients, a separate container for wet ones, and silicone molds or your hands for shaping.
  • Dry Mix: In the bowl, combine baking soda, citric acid, and Epsom salts. Mix well.
  • Wet Mix: In the separate container, combine water, essential oils, carrier oil, and colorant (if using). Stir until well-blended.
  • Combine: Slowly pour the wet mixture into the dry ingredients while stirring continuously. The consistency should resemble wet sand.
  • Molding: Firmly press the mixture into silicone molds or shape them using your hands.
  • Drying: Place the molded bath bombs in a cool, dry place and let them set for at least 24 hours.

Tip: For added luxury, sprinkle dried flower petals or glitter on top before they dry!


  • 3. Customizing Your Bath Bombs: Making Them Uniquely Yours
  • The allure of DIY projects, especially bath bombs, lies in the ability to tailor them to your personal preferences. It’s not just about the fizz; it’s about creating a sensory experience that’s uniquely yours.
  • Scents: The aroma that wafts up as the bath bomb dissolves can set the mood for your entire bath. Lavender can transport you to a calming meadow, while eucalyptus might invigorate and refresh your senses. Essential oils not only provide fragrance but can also offer therapeutic benefits. For instance, chamomile can be soothing, while peppermint might rejuvenate.
  • Colors: Visual appeal is a significant part of the bath bomb experience. Natural colorants ensure you get vibrant hues without the worry of skin irritations. Beetroot powder can give a romantic pink, while turmeric offers a sun-kissed yellow. Spirulina can be used for a calming blue-green, and cocoa powder for a rich brown.
  • Add-ins: This is where you can truly let your creativity shine. Dried rose petals can add a touch of luxury, biodegradable glitter can bring a sparkle to your bath, and small toys encased in the bath bomb can make bath time a delightful surprise for kids.
  • In essence, customizing your bath bombs allows you to craft not just a product, but an experience. Whether it’s a relaxing evening soak or a morning burst of energy, your bath bomb can be the perfect companion.

Did You Know? A study from Statista highlighted the growing popularity of bath and shower products, with the global market value expected to reach about 48 billion U.S. dollars by 2022. This surge underscores the increasing demand for luxurious bathing experiences.

FAQs

  1. How long do handmade bath bombs last?
    • Typically, for best results, use within six months.
  2. Can I use food coloring in my bath bombs?
    • While possible, natural colorants are recommended to avoid skin irritations.
  3. Why is my bath bomb crumbling?
    • This can be due to not enough binding agent (like water) or letting them dry out too quickly.
  4. Are bath bombs safe for kids?
    • Yes, but always supervise children and avoid using strong essential oils.

Call to Action: Want more DIY wellness tips delivered straight to your inbox? Subscribe to our newsletter now!

Dive into DIY: Crafting Luxurious Handmade Bath Bombs Read More »

Breathe New Life into Old Furniture: The DIY Painted Furniture Guide

Breathe New Life into Old Furniture: The DIY Painted Furniture Guide

Breathe New Life into Old Furniture: The DIY Painted Furniture Guide

Image by alexeyzhilkin on Freepik

Hey there, DIY enthusiast!


Ever glanced at that old chair in the corner and thought, “It’s time for a change?” Before you even think of parting ways with it, why not give it a fresh coat of paint? It’s not just about saving money; it’s about the thrill of creating something beautiful with your own hands. And guess what? You’re not alone in this DIY journey. Statista tells us that Americans spent a whopping 457 billion dollars on home improvements in 2020. That’s a lot of revamped furniture!

Here’s What You’ll Need:

  • Sandpaper (a couple of different types)
  • Primer (your paint’s best friend)
  • Your choice of paint (latex or chalk paint are my faves)
  • Some good quality paintbrushes or foam rollers
  • A protective finish (like wax or polyurethane)
  • Painter’s tape (for those intricate designs)
  • Drop cloths (because mess happens)

Let’s Get Painting

1. Prep Time: The Foundation of Your DIY Project

Cleaning is Key: Before you even think about painting, it’s crucial to ensure your furniture is squeaky clean. Over time, furniture accumulates layers of dust, grime, and sometimes even sticky residues from spills.

  • Materials: A mild detergent, warm water, a soft cloth, and some elbow grease.
  • Method: Mix a few drops of detergent in warm water. Dip the cloth into the solution, wring out excess water, and wipe down the furniture. For stubborn spots, a gentle scrubbing might be necessary. Once done, wipe down with a clean, damp cloth to remove any soap residue and let it dry completely.

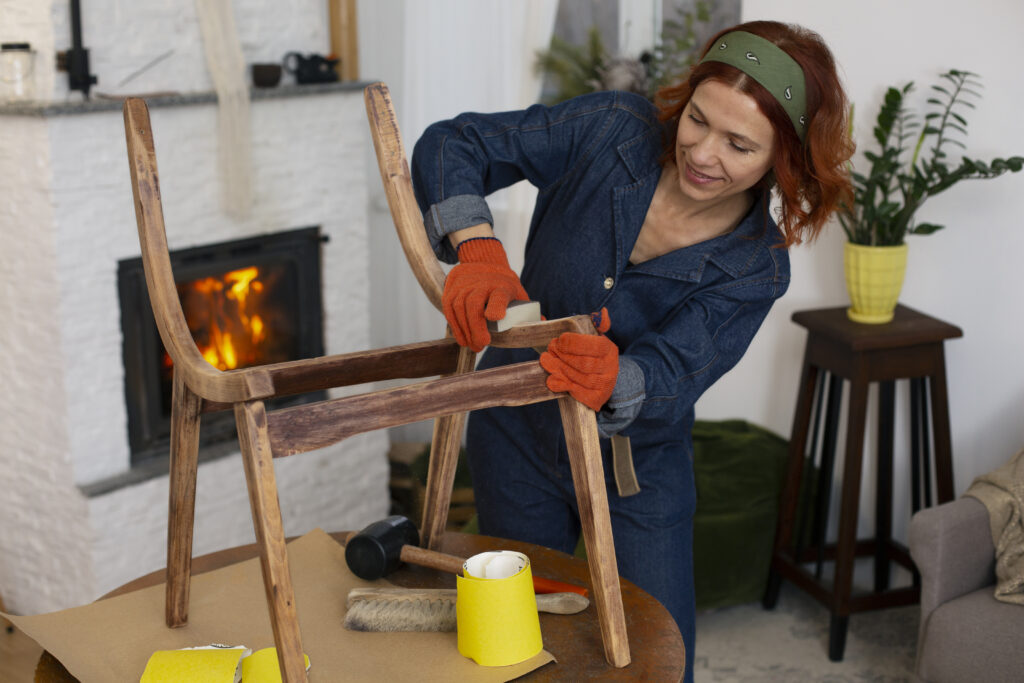
The Art of Sanding: Sanding might seem tedious, but it’s the secret sauce to a flawless paint job. It not only provides a smooth surface but also creates tiny grooves for the paint to adhere better.

  • Materials: Sandpaper in various grits (start with a coarser grit like 80 and move to a finer one like 220), a sanding block or electric sander for larger pieces, and safety gear (dust mask and goggles).
  • Method: Start sanding in the direction of the wood grain. This reduces the chances of scratches that can show up post-painting. Begin with the coarser grit to remove old paint or varnish and smooth out imperfections. Gradually move to finer grits for a silky smooth finish. Once done, wipe away the dust with a tack cloth or a damp rag.

Why Bother?: You might wonder if all this prep work is worth the effort. The answer is a resounding yes! Proper preparation ensures:

  • Better Paint Adhesion: Paint sticks better to a surface that’s been sanded.
  • Longer Lasting Results: With proper cleaning and sanding, your paint job will stand the test of time.
  • Smoother Finish: Nobody likes a bumpy, uneven paint job. Sanding ensures you get that professional, smooth finish.

Remember, the foundation of any great DIY project lies in its preparation. So, while it might be tempting to dive straight into painting, taking the time to prep will ensure your efforts shine through in the final result.


2. Prime Time: The Unsung Hero of Your Paint Job

  • Priming is often the overlooked step in the DIY painting process, but it’s the bridge between your furniture’s surface and the paint. Think of primer as the middleman that ensures both parties communicate well.

Why is Primer So Important?

  • Adhesion: Primer provides a surface that paint can easily adhere to. Without it, paint might peel, chip, or flake off over time.
  • Uniformity: Ever noticed how some paints can look blotchy or uneven on raw wood or over old paint colors? Primer ensures a consistent base, leading to a more uniform paint color.
  • Durability: A primed surface can significantly extend the life of your paint job, ensuring it looks fresh and vibrant for years.
  • Choosing the Right Primer:
    There are various primers available, each designed for different materials and purposes. For most furniture projects, a water-based primer works wonders. However, if you’re working with a piece that has stains or if you’re transitioning from a dark to a light color, an oil-based primer might be your best bet.

Application Tips

  • Ensure your furniture is clean and sanded.
  • Using a brush or roller, apply a thin, even coat of primer.
  • Allow it to dry completely (typically a few hours, but always check the product’s instructions).
  • Once dry, give it a light sanding with fine-grit sandpaper to ensure a smooth surface for painting.
  • In essence, while it might seem like an extra step, priming is the secret ingredient to a professional-looking, long-lasting paint job. So, when it’s prime time, give it the attention it deserves!

3. Show your true colors: The Joy of Painting

  • Embrace Creativity: Painting is as much about expression as it is about color.
  • Avoid Rushing: Hasty painting can lead to streaks, drips, or uneven coverage.
  • First Coat is Fundamental: Ensure it’s applied evenly and without excess.
  • Patience Pays Off: Allow the first coat to dry thoroughly. This can vary from a few hours to overnight.
  • Check Environmental Conditions: Humidity and temperature can affect drying time.
  • Second Coat Success: Once the first coat is dry, the second coat will adhere better and give a richer hue.

Remember: Good things come to those who wait. Your furniture deserves the best finish.

Oops! Watch Out for These:

  • Forgetting to Sand: It’s like trying to stick a post-it note on a dusty shelf.
  • Not Cleaning Properly: Paint and grime? Not a good mix.
  • Going Cheap on Brushes: Streaks and stray bristles can ruin your day.

Wrapping Up: With a dash of creativity and a sprinkle of effort, you can turn drab furniture into fab centerpieces. It’s eco-friendly, wallet-friendly, and oh-so-satisfying.

Got Questions? I’ve Got Answers:

  1. Which paint should I pick?
    • I love latex and chalk paint. Both are fab for furniture.
  2. How long between coats?
    • A day (24 hours) is a safe bet.
  3. Varnished wood. Can I paint it?
    • Absolutely! Just sand and prime first.
  4. How do I care for my masterpiece?
    • Gentle cleaning with a soft cloth works wonders.

Stay in the Loop:
Fancy more DIY tips and tricks? Subscribe to our newsletter. Let’s keep the creativity flowing!

Breathe New Life into Old Furniture: The DIY Painted Furniture Guide Read More »

Scroll to Top